
Imagine if every person that visited your website saw your top-performing posts! Just imagine how this would boost your overall engagement and lower your bounce rates.
It would make sense that you have your best performing blog posts displayed prominently on your website wouldn’t it?
The short answer is yes. YES, it would.
However, there is still a pressing question. How can this be done? How can I strategically display popular posts across my website?
Well, you are in luck because I have the perfect solution to solve this problem.
In this article, I will be showing you how you can display popular posts on your website in a few simple steps!
So without further ado, let’s dive straight into the article.
Table of Contents
- The Best Plugin To Display Popular Posts
- Why Should I Use MonsterInsights To Display My Popular Posts?
- How To Display Your Popular Posts Directly From Google Analytics
- Step 1: Set up the Post Type Custom Dimension
- Step 2: Indicate How You Want Your Popular Posts To Be Sorted
- Step 3: Add The Top 5 Posts From Google Analytics
- Conclusion
The Best Plugin To Display Popular Posts
![]()
When it comes to this feature there is only one plugin that comes to mind. That plugin is MonsterInsights.
MonsterInsights is hands down the best WordPress Analytics Plugin on the market and to date is used by over 2,000,000 professionals across the world.
MonsterInsights has a ton of different unique features that make it an amazing analytics tool. These features include universal tracking, real-time statistics, enhanced eCommerce tracking, and custom dimensions.
The best part? MonsterInsights can be set up and running on your website in just a couple of minutes.
All in all, MonsterInsights is a fantastic plugin and should definitely be included in every WordPress users’ toolkit.
Related: 13 Most Powerful WordPress Plugins (2021)
Click HERE To Try MonsterInsights For Free!
Why Should I Use MonsterInsights To Display My Popular Posts?
I know. I know. This question was on the top of my mind when MonsterInsights announced that they were rolling over the Popular Post feature along with the Contextual Insights feature.
However, MonsterInsights has proven that it’s clearly one of the best plugins to use to display a popular post thanks to the intuitive and clean layout. Needless to say, it’s pretty easy to set up.
There are three different ways you can display your popular posts on your WordPress website. They are:
Inline Popular Posts – Display the posts within the text of your content.
Popular Posts Widgets – Easily show up to 10 different posts on the sidebars of your blog posts.
Popular Products – This is for the e-commerce store owners who want a unique way to show their best-selling products to their customers.
Here’s how the Inline Popular Posts will look on your website:

Keep reading to see how you can use this exact feature on your WordPress website.
Here’s how the Popular Products feature will be displayed on your website:
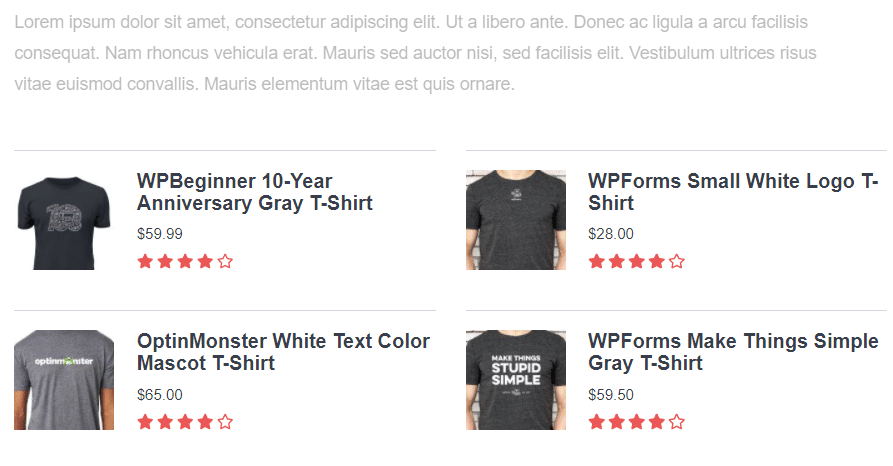
Needless to say, MonsterInsights provides you with a wide range of different themes, colors, and fonts to choose from. That means you can let that creative genius within run free!
The best part? You don’t even have to leave WordPress in order to make these changes, everything is handled right there in the WordPress dashboard.
How To Display Your Popular Posts Directly From Google Analytics
In a rush? Well, here are the steps that you need to take in order to display your popular posts on your WordPress website directly from Google Analytics.
Step 1: Set up the Post Type Custom Dimension
Step 2: Indicate How You Want The Popular Posts To Be Sorted
Step 3: Add The Top 5 Posts From Google Analytics
That’s pretty simple! Only 3 steps and you can have your popular posts displayed on your website in no time!
Let’s take a more in-depth look at these 3 steps.
Step 1: Set up the Post Type Custom Dimension
Custom Dimensions simply allow you to track your custom data and display it on your MonsterInsights dashboard and reports. The Post Type Custom Dimension allows you to track the overall performance of every post.
If you have already set up the Post Type Custom Dimension you can move on to the next step. However, if you haven’t set up the Post Type Custom Dimension as yet click here to get a detailed tutorial from MonsterInsights on how it can be set up. (Don’t worry it’s pretty easy to set up).
P.S If this is your first time setting up the Post Type Custom Dimension you will have to wait 24 – 48 hours for it to take full effect in Google Analytics.
Step 2: Indicate How You Want Your Popular Posts To Be Sorted
To successfully complete this step go to Insights and click Popular Posts and then click Inline Popular Posts and click Sort by.
You will then see three different options, Comments, Shared Count, and Curated. Click Curated, in the box below the Curated button, begin typing the posts that you want to be added to your list.
If you want to delete any posts from the selection just click the ‘x’ on the left-hand side of the post.
Step 3: Add The Top 5 Posts From Google Analytics
The last step is to add the top 5 posts directly from Google Analytics. To do this go to Insights then Popular Posts then Inline Popular Posts then Automated + Curated.
Next, click the Add Top 5 Posts From Google Analytics to switch it to the “on” position.
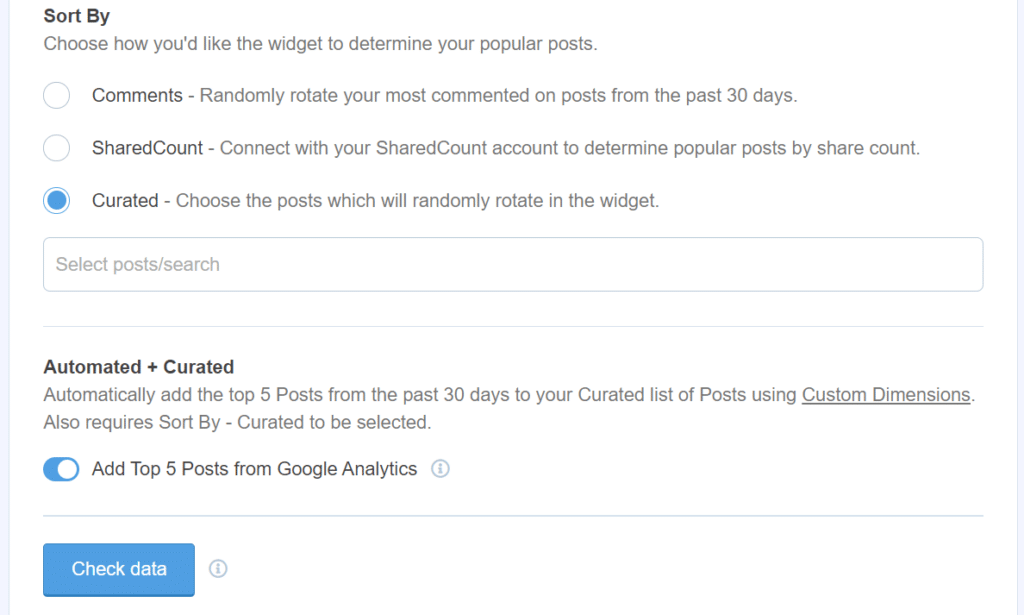
Next, click the Check Data / Check Configuration button.
BOOM! Your top 5 posts are now being displayed directly from Google Analytics.
P.S To see your top 5 posts displayed, visit the page where you inserted your Inline Popular Posts.
Conclusion
There you have it! A step by step guide on how you can easily add your top 5 performing posts directly to your WordPress website.
If you don’t have access to MonsterInsights click here in order to try it for free today!
Also, Check Out These Other Related Articles:
- The Best WordPress Contact Form Plugin (2021)
- 13 Best Security Plugins For WordPress (2021)
- How To Install Google Analytics On Your WordPress website (2021)